Added: 20 August, 2007
Group: Photoshop
Create Gloosy orb in Photoshop
Author: Note
GO to: Page 1 : Glossy orb
page: 1
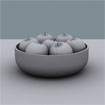
Glossy orb
You can choose color, but everything else such as level of transparency, switching the foreground and creating the orb are the things which illustrations you can find here.

Glossy Orb Tutorial
Note: Although Photoshop CS3 was used for this tutorial, this tutorial should work just fine with any older (or newer) version of Photoshop. The terms may be slightly different if you have Photoshop 7.
Step 1. You guys should know the routine by now: create a new document, File > New

400px by 400px, RGB 8 bit, transparent, and 72 for your resolution (px/inch).
Step 2. Rename your layer to Background by double-clicking on the layer text.

- Press D to reset foreground to black and background to white,
- Press X to switch the foreground to white and the background to black.
- Press Alt + Backspace to fill the whole document with white.
Step 3. Now its time to create the orb. Get out your elliptical marquee tool and make a perfect circle by holding down Shift while drawing your circle. Make the circle a little bit smaller than 1/3 the height and width of the document.

Position it in the center. To move your circle, while having the elliptical marquee tool selected, just click and drag the selection to the center.


Step 4. To make the orb look like a 3d orb, at the center, the color must be light/brighter than the area around the outline of the circle. For example, if you wanted to create a blue orb, for the foreground, you should select a lighter blue and then for the background, a darker blue should be selected.
Once you have your lighter blue selected, select your background color by eye-dropping the lighter blue and then selecting a darker blue from that lighter one. If youre confused just look at the images below :)


Step 5. Its time to create the gradient. Using the gradient tool,

select the right settings:

Make a gradient going from the center of the circle to the outline of the circle.

Then, rename the layer to Orb.
Step 6. Make a new layer and then rename it to Gloss. While holding down Ctrl, click on the layer thumbnail of the Orb layer.

Select white as your foreground color and then select the gradient tool. Now click on the part where the cursor in the screenshot is below.

This opens up a new dialog box where you can now select Foreground to Transparent option.

Now starting from the top of the orb, make a gradient just ending past the center of the orb.

Once again, to create a straight line (straight gradient), hold down Shift while drawing the gradient.
Step 7. We still got 1 more thing to do to this Gloss layer. With the Gloss layer selected, make an elliptical marquee selection like such:

Now the stuff inside the selection is what we want, so we have to delete everything outside of it. To do this, press Ctrl + Shift + I to invert the selection so it instead selects everything else. Then Del to delete everything else (on this Gloss layer).
Now move the gloss a little bit down like such:

Finished!
Step 8. Now optionally, we are going to use the techniques from the Reflection tutorial in order to create a shadow and a reflection.
Duplicate the orb layer, Ctrl + click the layer thumbnail and then fill with black. Press Ctrl + D in order to deselect the selection and then Filter > Blur > Gaussian Blur .

Select a blur radius of around 8 px.
Transform it so it actually looks like a shadow beneath the orb.

I think this could use another Gaussian blur so go ahead and apply one with the setting of around 7-8 px.
Now lower the opacity to 80%. Rename the layer to Shadow.
Step 9. Select the Orb layer and then while holding down Shift, click on the Gloss layer to select both of them simultaneously. Drag these 2 layers onto the Create a new layer icon to duplicate them. Place the newly duplicated layers below everything except for the Background layer.

Press Ctrl + T to transform them and then enter in -100% in the height box to flip this vertically.

Move it down below the shadow and then transform it so it is vertically smaller or just keep it the same. Then press Ctrl + E to merge the two reflection layers to 1 layer. Rename the resultant 1 layer to Reflection.
Step 10. Press D, press Q (for quick mask), then make sure for the gradient tool, its set to Foreground to Background and a Linear Gradient.

Make a gradient from the top of the orb to the bottom of the reflection orb.

Press Q to get out of the quick mask and then press Del.
Finished!
GO to: Page 1 : Glossy orb
TechTut.com This tutorial is copyrighted. Partial duplication or full duplication is prohibited and illegal. Translation or usage of any kind without author�s permission is illegal.


 Join our RSS feed
Use our RSS feed to get the latest published tutorials directly to your news reader.