Added: 18 August, 2007
Group: Photoshop
Motion Blur Tutorial for Photoshop
Author: Note
page: 1
Motion Blur Tutorial
Here you find the instructions for creating a simple motion blur by using Photoshop.
Made with Photoshop CS3, but will work with most previous versions (and later).
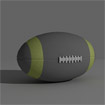
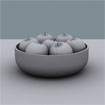
Step 1. Lets say you would like to make an object look likes it is dropping. And seeing as there is an orb tutorial, we will be using the orb as our object.
New document, then put your orb in there. White background, 300px by 300px.

Step 2. Duplicate the layer and then apply a Motion blur filter. Filter > Blur > Motion Blur.


Remember to place the duplicated blurred layer below the orb layer
Move the blur up a little bit.

Step 3. Add wind.
Duplicate the blur layer and place the duplicated layer below the other 2 layers by the way. Rotate by 90 degrees and then go to Filter > Stylize > Wind.


Rotate it back to how it was and then apply a Gaussian blur filter. Filter > Blur > Gaussian Blur.

Lower the opacity to 75%.

Now combine both the blurred layer and also the winded layer. Then, get out the smudge tool with the following settings:

Finally, make your own smudges so that they look like its falling. To make it convincing, however, you will need to adjust the strength every so often. With the strong ones, try to make them look less apparent.
Final:

GO to: Page 1 : Motion Blur Tutorial
TechTut.com This tutorial is copyrighted. Partial duplication or full duplication is prohibited and illegal. Translation or usage of any kind without author�s permission is illegal.


 Join our RSS feed
Use our RSS feed to get the latest published tutorials directly to your news reader.