Added: 23 August, 2007
Group: 3D studio max
Drinking glass with liquid and ice cubes
Author: TechTut.com
page: 2
Model 3D glass object, liquid and ice cubes part2
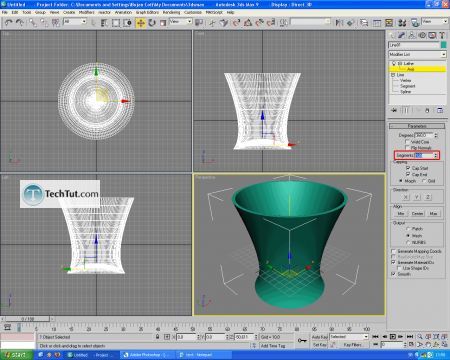
Click on small plus near Lathe and select Axis. With Selection tool type in coordinates box 0 for X axis and hit Enter.
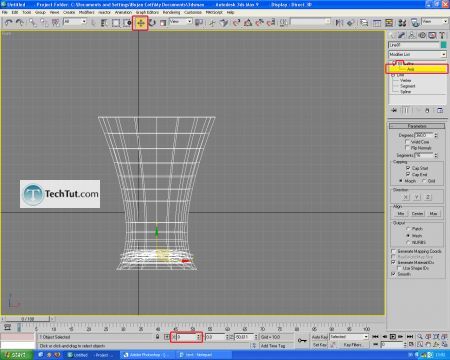
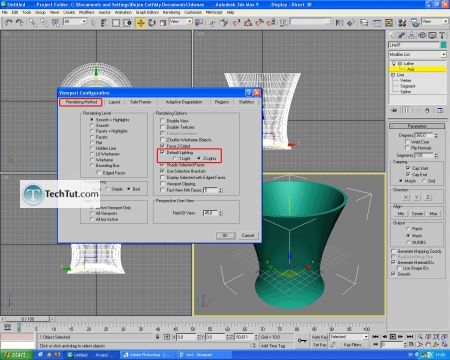
In Segments box of Lathe modifier type 128 to get edges smoother. If your model is black, go to Customize>Viewport Configuration and in first slot activate Default Lighting and 2 Lights and hit OK.
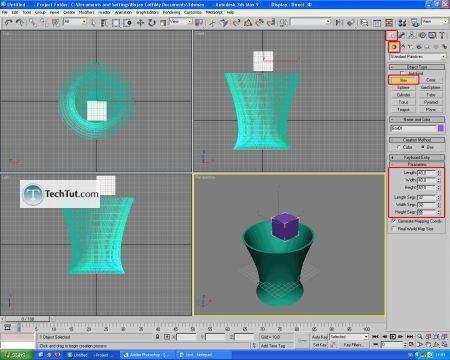
OK, it is time for ice cubes. Create one box and put it above our drinking glass. Set Length to 40, Width to 40 and Height to 40. Also, set Length, Width and Height Segments to 32. You can hit F4 to see edges of objects in scene.
Apply Noise modifier to this box.
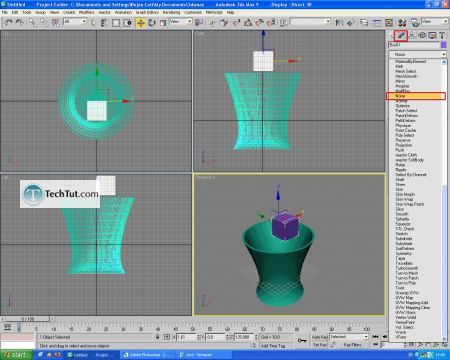
In Noise parameters set the values displayed on picture.
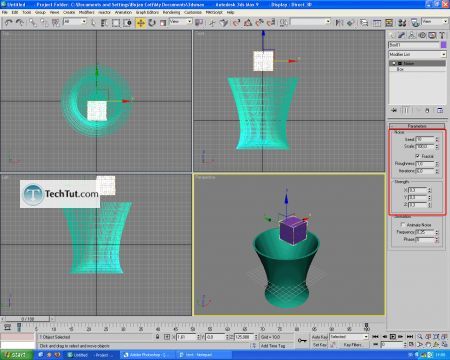
Clone this box three times. After that, rotate boxes in different ways and also move them little.
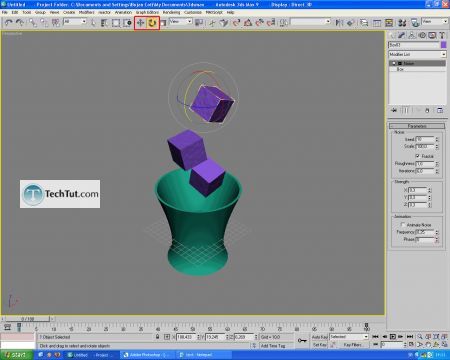
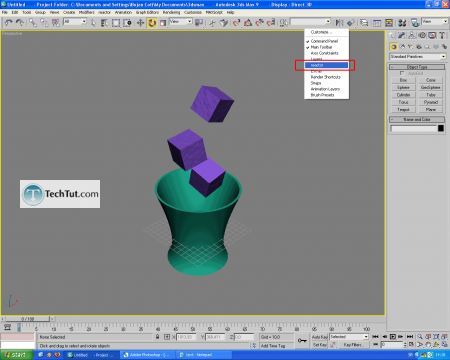
Now we have to put this ice cubes in our drinking glass. We can do that with Reactor. Before that select all boxes and collapse them to Editable Mesh. Open Reactor toolbox as displayed on picture.
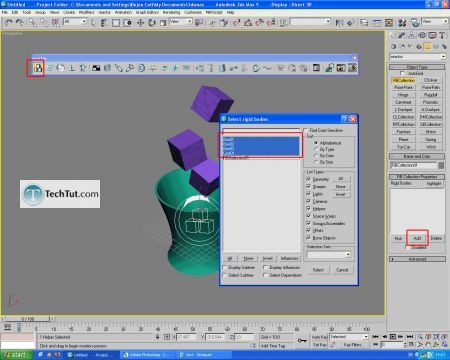
Select Create Rigid Body Collection and put it anywhere in scene. In parameters of this select Add and add all objects in scene except Rigid Body and hit Select.
Select our drinking glass and select Open Properties Editor and set Mass to 0. Set Simulation Geometry to Concave Mesh.
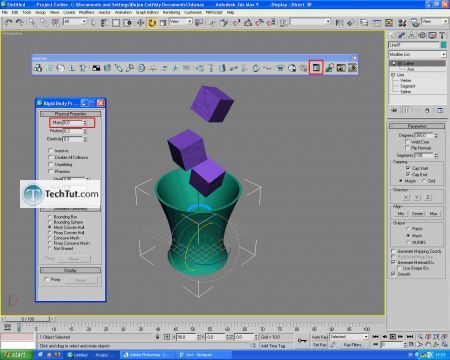
Select all of the boxes and set Mass to 5 in same way. Set Simulation Geometry to Concave Mesh.
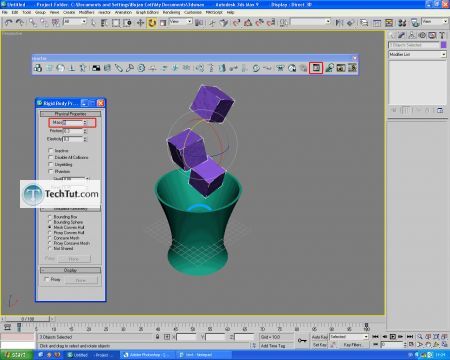
Now go to Preview Animation button and see the animation. Hit P to play and again P to stop.
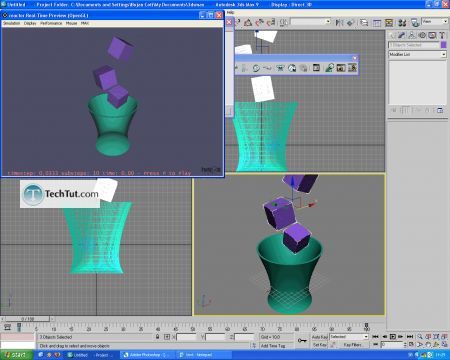
Go to MAX and click on Update MAX. Get out of Reactor Preview.
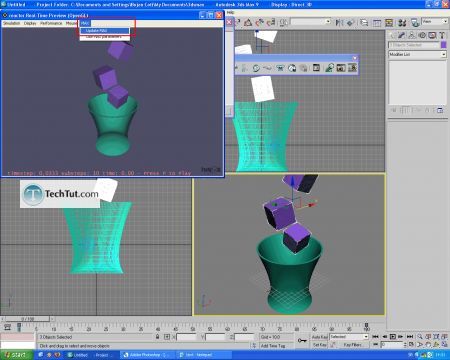
Boxes are now in our drinking glass.
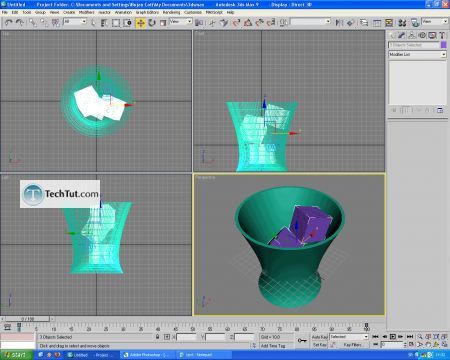
It us time to create one cylinder and he will act some liquid in our drinking glass. Parameters for this cylinder is displayed on picture. Create one and convert it in Editable Poly.
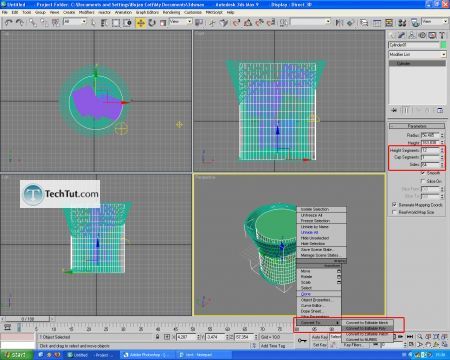
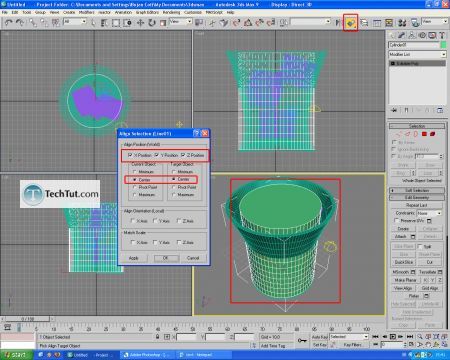
Note that cylinder must be in center of drinking glass. Select cylinder, select Align and select drinking glass. Click OK.
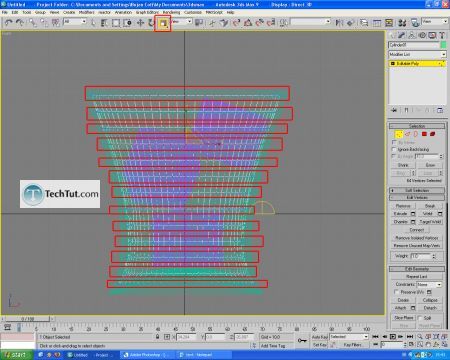
Go to cylinder vertex mod and select vertexes displayed on picture. Go to Front viewport by hitting F key. Scale vertexes to follow figure of drinking glass.
GO to: Page 1 : Model 3D glass object, liquid and ice cubes part1
GO to: Page 2 : Model 3D glass object, liquid and ice cubes part2
GO to: Page 3 : Drinking glass lighting materials and render
TechTut.com This tutorial is copyrighted. Partial duplication or full duplication is prohibited and illegal. Translation or usage of any kind without author�s permission is illegal.

 Join our RSS feed
Use our RSS feed to get the latest published tutorials directly to your news reader.


