Added: 10 October, 2007
Group: Photoshop
Car tuning photoshop tutorial replace rims
Author: Photoshoper
page: 1
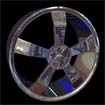
Replace rim photoshop tutorial
This tutorial will show you how to replace car rims using photoshop.

Rims replacement

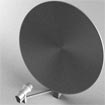
2.Find a donor car for the Rimes that's common from the perspective angle. If it's not in the right position- go to Image > Rotate Canvas > Flip Canvas Horizontal

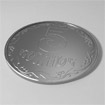
3. Hold CTRL and hit + to zoom in, then use Elliptical Marquee Tool(M) and right click on the Rim and Transform Selection, holding CTRL left click with your mouse on one little square to bring the circle to the Rim edge, hit Enter and click on Move Tool(V) and drag the Rim on the picture, and

4. Do not worry if you can't place to be an exact match.

5. Hit CTRL+T to transform the new rime to fit to the tire. Angle can be modified with holding CTRL+ALT, and in the same time with your left click holding and dragging in the desired way. You can also rotate it until you achieve the same or nearby the angle of the original rime. Hit enter to apply the transformation, now drag the rime on the old one and here you can make it bigger if you want all the way to 25" or more :)
Now place the rime over the old one and make here the fine adjustments

6. Then duplicate the main layer with the car, drag the duplicated layer over the one with the rim (Layer1)

7. Go to Blending Options>Drop Shadow to imitate the border like on the original rim- so all look realistic.

8. Right click on the Layer1, or double click on it, choose Blending Options and turn the Opacity to 0%

9. Zoom in and with the Polygonal Lasso Tool (L) make the selection to cut off the part of the new rim that doesn't fit in (Picture/step 7)


10. Hit CTRL+D to deselect ,then go to Blending Options >Inner Shadow like on the setting or else, this is the easier way to make realistic shadow in a few seconds or if you are good with brushing then make it that way.
If needed use Blur or Sharpen the new rims to fit perfect to the Picture with the car !

11. Now do the same with the rear Rim, at the end go to Layer>Flatten Image, and that's it!
I think you can do this even better than I can!
Thats all.
GO to: Page 1 : Replace rim photoshop tutorial
TechTut.com This tutorial is copyrighted. Partial duplication or full duplication is prohibited and illegal. Translation or usage of any kind without author�s permission is illegal.


 Join our RSS feed
Use our RSS feed to get the latest published tutorials directly to your news reader.