Added: 10 September, 2007
Group: 3D studio max
Realistic looking computer case
Author: TechTut.com
page: 3
Computer case object in 3D max part 3
Now to create something to cover that hole. Cylinder with parameters like on picture (sides 34,cap segments 10)

Select like on picture and extrude it in. Create six cylinders to dig some holes (with Boolean..)


Now there are those ports but I wont explain that, because I think you learn something till now, just look at the pictures.


Inset polygon, extrude it in, click tessellate button few times and then select some polygons and extrude them in.

Now places for those cards (video, soundâ¦)itâs the same just use inset, connect(5 segments),then some bevel in. Same for USB ports(bevel/extrude/in-out).

And for the end creating a bolt Just make a cylinder (8 sides)cut some edges, and extrude in polygons


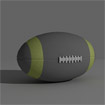
For light material use green color and in material editor choose selfillumination. Put light in scene (choose Omni light and use area shadows). Press F10 button and render.

GO to: Page 1 : Computer case object in 3D max part 1
GO to: Page 2 : Computer case object in 3D max part 2
GO to: Page 3 : Computer case object in 3D max part 3
TechTut.com This tutorial is copyrighted. Partial duplication or full duplication is prohibited and illegal. Translation or usage of any kind without author�s permission is illegal.


 Join our RSS feed
Use our RSS feed to get the latest published tutorials directly to your news reader.